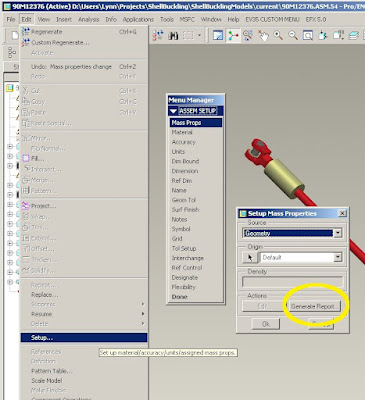
- Make sure the material is assigned in the model, or in the parts if it is an assembly. To do this, pick the drop-down Edit/Setup, and pick "Material", then choose an appropriate material. (More details on this)
- Run a Mass Props report on the model or assembly: drop-down menu Edit/Setup, and pick "Mass Props", then click "Generate Report".

WARNING!
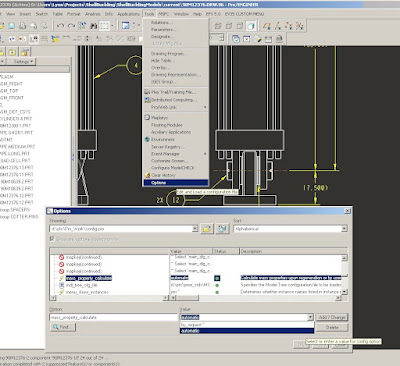
Mass_property_calculate has the default setting of "by_request"; mass properties report must be run to update the weight each time model changes are made. Set it to "automatic" by picking Tools/Options, type "mass_property_calculate", choose "automatic", "Add/Change", "Apply", then "Close".

- The parameter PRO_MP_MASS should now contain the weight of the part/assembly.
- Choose Tools/Parameters and make sure that there is one called "MASS", with type = "Real Number"


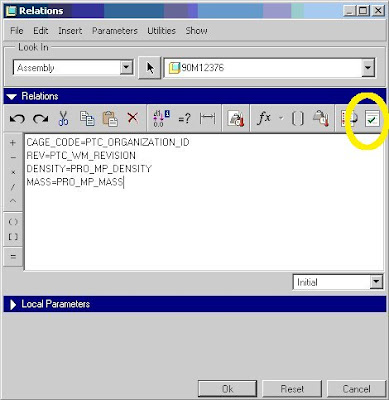
- Choose Tools/Relations, and add the following line if it is not there already:
MASS=PRO_MP_MASS
- In the Tools/Relations panel, click the "Execute/Verify Relations..." button. This activates the relation.

In the Drawing:
This text: "&MASS" in a note or table will display the mass. If more than one model is attached to the drawing, the mass will be for the active model. The id for the active model will be added in the text, which can be seen when the text is edited and when Info/Switch Dimensions is selected. For example, &MASS:5 is the mass for model id 5.
- Less decimal places:
To control the number of decimals displayed, add [.#] to the right of the callout, where # is the number of decimals to display. For example:
For zero decimals: &MASS:5[.0]
For two decimals: &MASS:5[.2]